


I am not really good at memorizing scripts while recording videos of me talking to a camera. I usually spend hours recording multiple shots just to get 2 min of a video done right!
I tweeted about this recently:
After publishing this tweet, my friend Alexis responded:
He actually knows me well, because that what exactly I had in mind. I like to build stuff! So let's build a cheap teleprompter, for under $20, in 20 minutes or less.
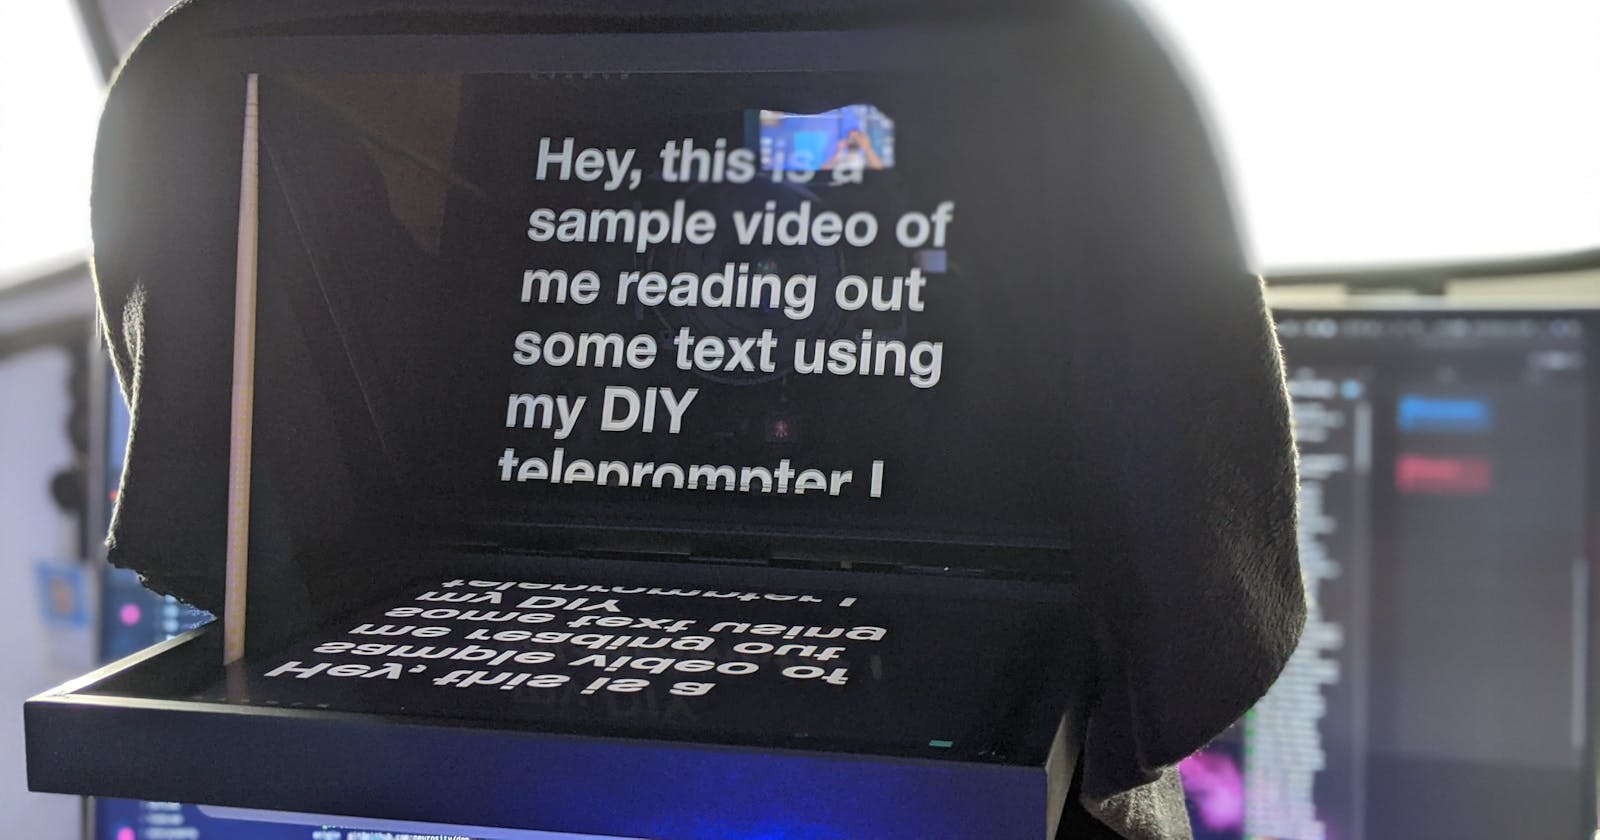
By the way, here is the final result (in a video):
What's a teleprompter?
According to Wikipedia: "A teleprompter, also known as an autocue, is a display device that prompts the person speaking with an electronic visual text of a speech or script."
Because a picture is worth a thousand words, I made a simple drawing explaining how a teleprompter works:

Components you will need
x2 wooden pictures frames with clear glass

From your local hardware store, buy 2 wooden picture frames. Make sure the frames are in wood and the glazing is clear glass (not plastic). The backing board should be solid wood (but this is not mandatory). Also, the picture frames should be large enough to hold your monitor/tablet/phone or any device that you will use as a display. Mines were large enough to hold an iPad Pro. But you can choose any other format.
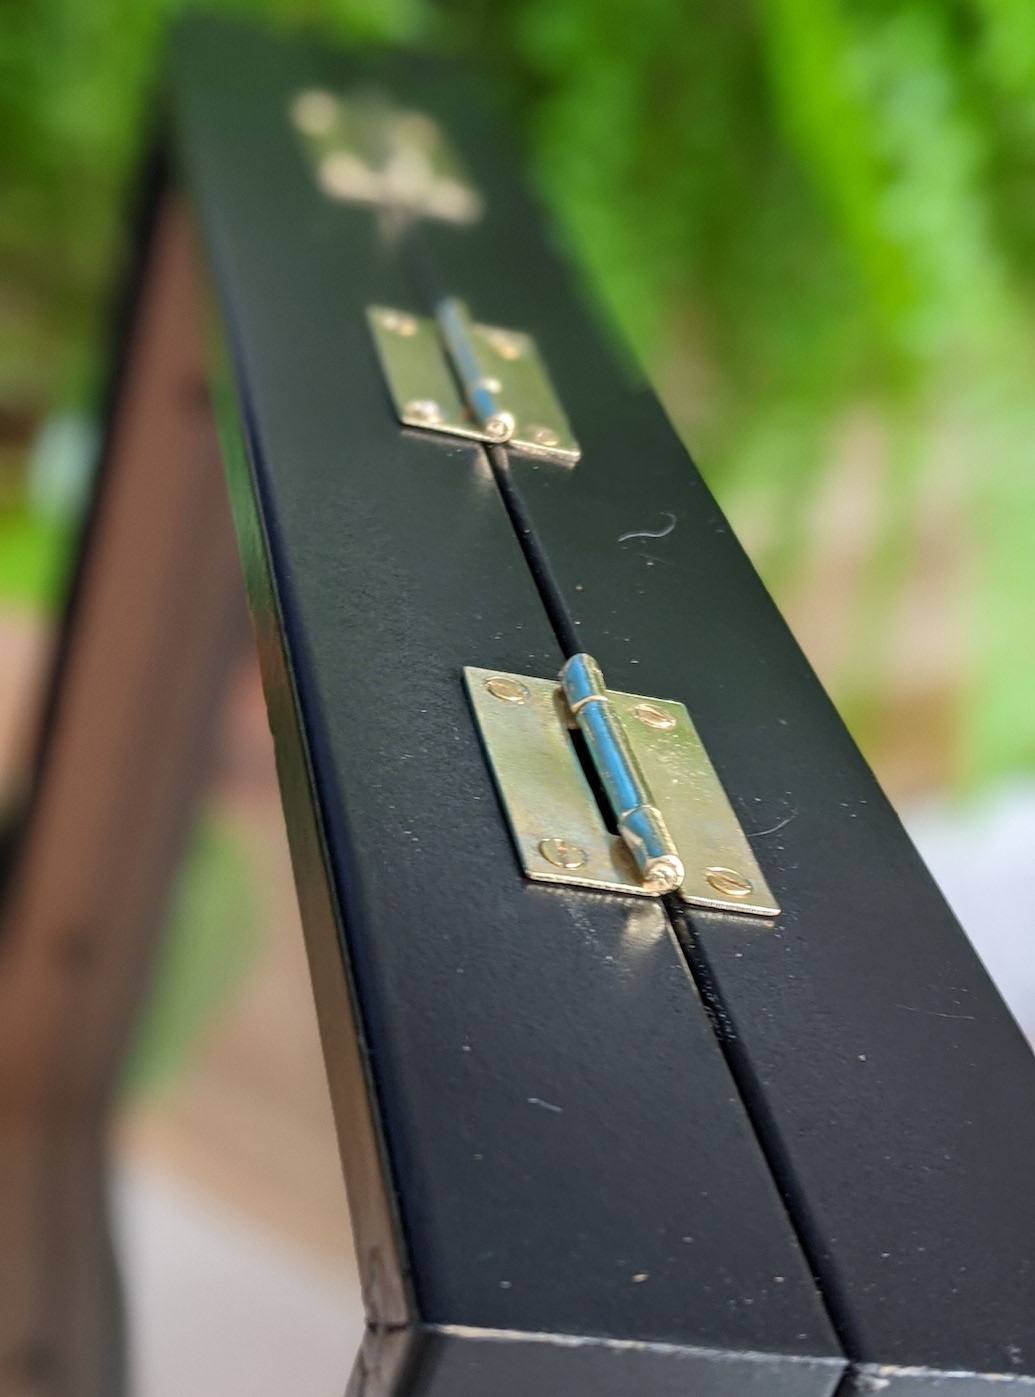
x3 pairs of solid brass butt hinges

You will also need 2 or 3 pairs of solid brass butt hinges that we will use to hold the 2 frames together. My frames are 24x30 cm (9x11"), so I used 3 pairs of 25mm hinges.
Make sure the screws that come with the hinges are not too long so they don't pass all the way through the frames!
A dark piece of sheet
We will need a dark piece of sheet to protect the teleprompter glass against any reflections coming from our light sources.
The rest...
Next, you will need:
- A piece of small wood or a wooden stick.
- A black aerosol spray paint can.
- Your usual camera setup.
- A device with a screen. This could be a tablet, a phone, or an external monitor connected to a computer.
- A teleprompter app (with "mirror" support).
How-to...
1- Carefully disassemble the picture frames. Keep only 1 glazing panel and 1 baking board (and the 2 frames, obviously!). You can get rid of all the other components or use them as spare parts.

2- After you removed the glass panel, put it in a secure place, we will use it later. Now, hold the 2 frames together "like a closed book" and place the hinges on one of the sides. Make sure to place frame A on top of frame B, with both frames facing down (see figure):

WHY? Inside frame B, we will place our screen/tablet which will sit on the baking board. Frame A will be placed on top of frame B, with the glass facing down, and tilted at 45 degrees, like an open book.
3- Once you marked where the hinges are going to be placed, drill very tiny holes that will hold the screws.

4- Then, tightly screw all 3 hinges.
5- If some of the components are in white or any other clear color, paint them all in black so that all components (except the glass) are dark. This would help absorb any lighting coming from our light sources.
Note: I painted both back panels just in case I needed a spare one!

6- Once all components are painted and dried, place the glazing panel back on frame A, and the back panel on frame B.

7- We are almost done. Using a small stick of wood (or any other item that you have on hand). Frame A should be tilted at 45 degrees, but feel free to adjust to your convenience.

8- If you have any light sources placed behind the camera, you would see reflections on the glazing panel on frame A.

9- To avoid this, place a dark piece of the sheet between the camera and the back of frame A.

10- Lastly, place your screen/tablet/monitor inside frame B with the screen facing up, and bump up the brightness. Open your teleprompter app and adjust the text size. Make also sure to turn on the "mirror" mode, or you can practice reading reverse text (😂)!
Note: you can skip steps 2-4 if you can buy an already hinged picture frame with a glass front!
Congratulations!
You just built your DIY teleprompter! Congratulations!

Please share your creations and show us how is your teleprompter looks like.
Follow me at @manekinekko for more hacks and DIY tutorials.